Maximizing the effectiveness of a direct mail campaign starts with knowing how to prepare a mailing list for direct mail.
This comprehensive guide will walk you through the step-by-step process of leveraging Excel to meticulously organize and refine your mailing list, ensuring precision targeting and optimal engagement. From cleaning and formatting data to segmenting your audience for tailored messaging, unlock the power of Excel to propel your direct mail efforts to new heights of success.
In today’s digital age, direct mail campaigns remain a powerful tool for businesses to reach their target audience. A well-prepared mailing list is essential for a successful campaign, whether you’re sending out promotional materials, newsletters, or important announcements. Here’s a comprehensive guide on how to prepare your mailing list using Excel for seamless processing by a letter shop:
 Step 1: Gather Your Data

Start by compiling all the necessary information for your mailing list. This process typically includes:
- Recipient Names: If applicable, include first and last names, as well as any titles.
- Mailing Addresses: Including street address, city, state, and zip code.
- Additional Details: Any other relevant information, such as company names, departments, or specific preferences.
Step 2: Organize Your Excel Spreadsheet
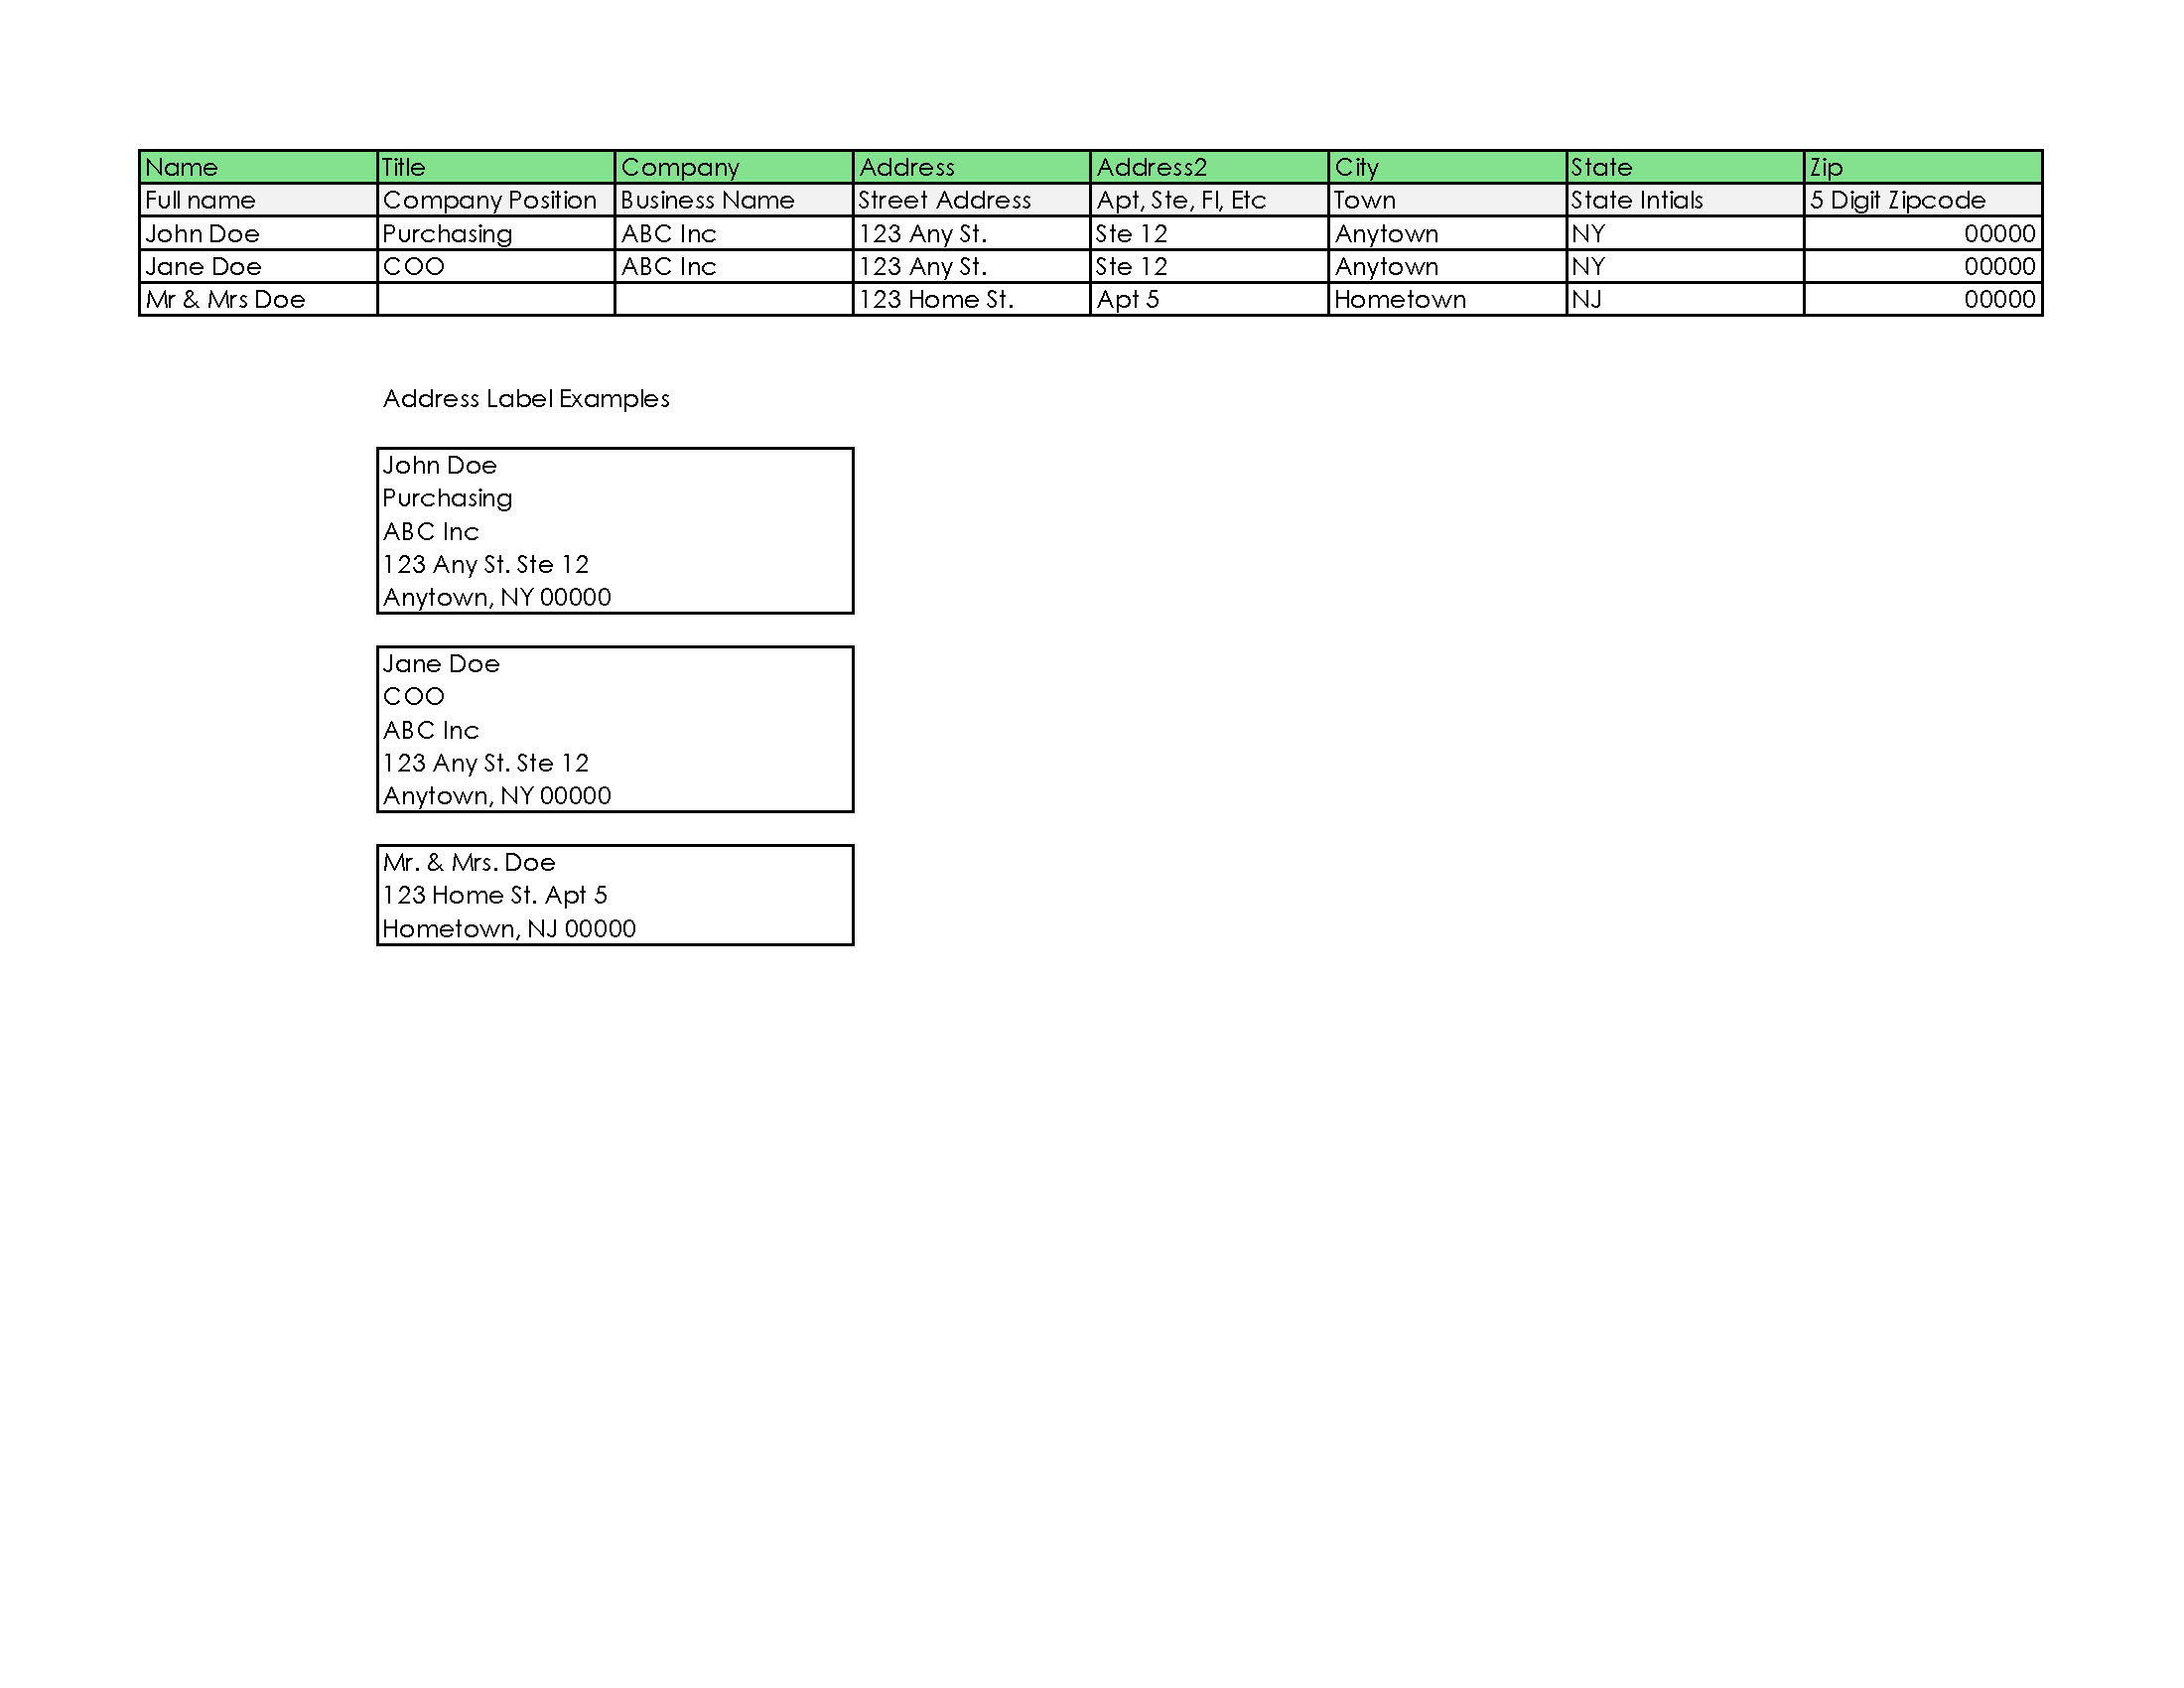
Open Excel and create a new spreadsheet. Organize your data into separate columns for each piece of information. For example:
- Column A: First Name
- Column B: Last Name
- Column C: Company Name
- Column D: Address Line 1
- Column E: Address Line 2 (if necessary)
- Column F: City
- Column G: State
- Column H: Zip Code
- Mailing list Data file sample
Step 3: Validate and Cleanse Your Data
Before proceeding further, it’s crucial to ensure the accuracy and consistency of your data. Here’s how:
- Remove Duplicates: Use Excel’s built-in feature to identify and remove duplicate entries.
- Check for Errors: Scan the data for misspellings, incorrect addresses, or missing information. Correct any errors manually.
- Format Consistency: Ensure that all data is formatted consistently throughout the spreadsheet. For example, use the same format for dates or addresses.
- Verify Addresses: Consider using address validation tools or services to verify the accuracy of mailing addresses.
Step 4: Add Additional Fields (Optional)
Depending on your campaign requirements, you may need to add fields to your mailing list. These could include:
- Email Addresses
- Phone Numbers
- Salutation (Mr., Mrs., etc.)
- Preferred Communication Channel
 Step 5: Save and Export Your Mailing List

Once your mailing list is organized correctly and validated, save your Excel spreadsheet in a secure location.
Step 6: Prepare for Letter Shop Processing
Before handing over your mailing list to the letter shop, follow their specific requirements. These requirements may include:
- Formatting specifications (CSV, Excel, etc.)
- File naming conventions
- Additional instructions or preferences
 Step 7: Handover to the Letter Shop

Once you’re confident that your mailing list is accurate and properly formatted, it’s time to send it to the letter shop for processing. Provide instructions and additional information they may need to ensure a successful campaign.
Conclusion
Preparing your mailing list for a letter shop using Excel requires careful attention to detail and organization. Following these step-by-step instructions ensures that your data is accurate, consistent, and ready for processing. With a well-prepared mailing list, you can maximize the effectiveness of your direct mail campaign and reach your target audience with ease.
For Additional Information, Contact the Postal Wizards at 631-892-4185
Easy Direct Mail Quote